News

Searching for Previous Codes

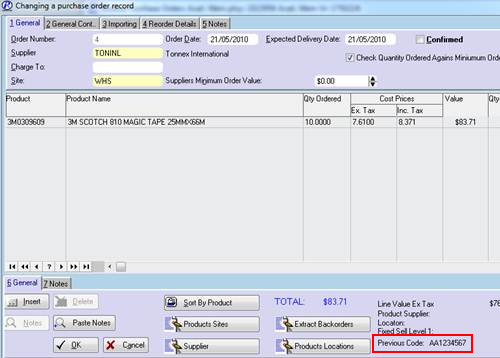
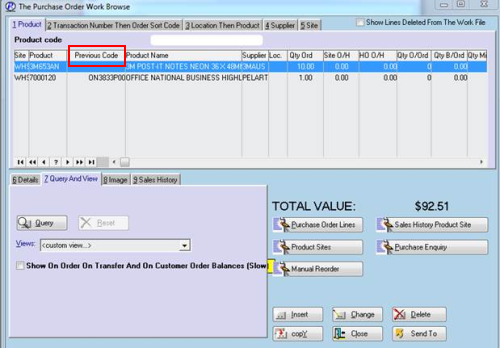
If your store has been converted over to Office Brands EZ Codes, you will need to use an alternative technique to search for your products based on their old code. Readysell now has a document available on our web site in the Support Downloads section. You can find it under Readysell Version 7 > Products and Stock as “How to search for Previous Codes”. Please refer to this document for more information about EZ Codes and how this affects your Readysell software.

Catalogue Loading Halt

As part of the Office Brands coding project, Readysell has deployed the new EZ-Codes as part of catalogue OP22. Readysell request that all customers who have not been explicity advised to do otherwise delete catalogue OP22 off your system.

If you have accidentally loaded this catalogue, please contact our support team for assistance.

Stocktake Procedure

Below is a brief point-form summary of what needs to be done in to run a full stocktake for an entire store.

  1. Run stock on hand report before you commence stocktake, log onto Readysell, select report wizard, type = management, description = stock on hand report; highlight it and click on run highlighted report, close query.
  2. Start Stocktakes, Log onto Readysell, Select Product Transactions,Close Stock Adjustments, Click on ‘Stocktakes’ icon top task bar.
  3. Run “Flag Products as not counted” on Tab 4 Modify, Exit = NO, Exit = NO, Exit = NO, close query.
  4. Add each stocktakes as follows:
    • Click on Insert
    • Ensure that the check overwrite flag check box is not TICKED
    • Enter or scan in product and input quantity
    • Click OK when all products entered
    • Highlight stock and click on tab 3 print, print stocktake variances for one stocktake before stocktake applied
    • Check variance report if you need to change any quantities then do so on each stocktakes
    • Repeat step 4 until all stocktakes entered
  5. Backup entire database before u apply any stocktakes (MUST ring Readysell)
  6. Apply stocktakes
    • Click on Tab 3 print”Print Stocktake variance for stocktakes by date range applied after stocktakes applied or print stocktake variances for all stocktakes by date posted after applied” ensure to archive and print either one
  7. Create empty Stocktake
    • Click on Insert
    • Ensure that the check overwrite flag check box is NOT TICKED
    • Click on tab 4 modify and select “Add all non counted products to this stocktake as zero on hand”, close query
    • Check it and then apply it
  8. Run another stock on hand report after applying and check products/qtyonhand (step 1).
  9. Adjustment stock takes after applying all stocktakes- click on insert a stocktake and enter products and quantities.
  10. Turn overwrite flag ON.
  11. Print Variance report before applying.
  12. Apply Stocktake.
  13. Print Variance after applying/archive.
  14. 14. Run another stock on hand and check products/qtyonhand.

Using Data Capture Unit – Cipher Lab

  1. From your desktop double click on Icon ‘8000 Cradel Shortcut’.
  2. Put scanner into cradle and select option 2 upload.
  3. Press any key to continue on command prompt.
  4. Click on Yes to download question.
  5. Print report.
  6. Press any key to continue on command prompt on ‘import pde transaction’.
  7. High – CIPHER LAB – CIPHER STOCKTAKE -DOULBE CLICK TO OPEN.
  8. Leave the Prefix and Suffix Box un-flagged and make sure they are CLEAR.
  9. Leave all other boxes as default settings all unchecked.
  10. Click on OK to continue.
  11. Click on OK again to accept stocktake number.
  12. Print report that appears.

Using Data Logic Unit

  1. Double click Readysell Mobile.
  2. Click on Stocktakes.
  3. Click on New Stocktake.
  4. Commence scanning products into the unit.
  5. Once finished scanning a location.
  6. Click on OK to accept.
  7. Stocktake created = click OK.

Manual stocktake within Readysell not using any mobile units

  1. Log onto Readysell.
  2. Select Product Transactions.
  3. Close out of Stock Adjustments.
  4. Click on ‘Stocktakes’ icon top task bar.
  5. Print stocktake work sheet.
  6. Physically start count stock and entering on worksheet.
  7. If it is for an entire store, remember the correct steps.
  8. Firstly “Flag Products as not counted”.
  9. Click on “Insert”   to insert Stocktake.
  10. Make sure you are in Add Mode (take overwrite tick OFF).
  11. Once all entries have been entered into Readysell.
  12. Print all variance reports before applying stocktake option.
  13. Check all negatives and discrepancies which may be on the stock take report.
  14. Do a backup (ring Readysell for backup).
  15. Apply your stock takes.
  16. Insert another stocktake for only for <Add all non counted products as to this stock take as zero on hand> only for entire store stock take, and print the variance report for this stock take.
  17. Check your flags one more time.
  18. Apply that Stocktake.
  19. If applying by Location, steps are different.
  20. Override or add mode depending on if product exists once.
  21. Do not run “add all non counted products to this stock take as zero on hand” for a single stock location as it will set the stock not counted at every other location as zero.
  22. Print Variance Report and make changes if need be.
  23. Check flags once again.
  24. Do a backup.
  25. Apply your stock take.

If Stocktake is by Location (or an adjustment stocktake)

  1. If running by location steps are different.
  2. Flag all products as not counted.
  3. Override or add mode depending on if product exists once.
  4. DO NOT RUN ‘ADD ALL NON COUNTED PRODUCTS TO THIS STOCKTAKE AS ZERO ON HAND” for a single stock location as it will set the stock not counted at every other location as Zero.

End of Year Procedure

Below is a brief point-form summary of what needs to be done in respect to the End of Financial Year.

IMPORTANT: Please make sure that a End Of Financial Year Backup is done and Removed from your Current Backup set and KEPT

SITES THAT ARE NOT RUNNING READYSELL GENERAL LEDGER

Please follow steps below:

  1. Set up a folder on the main drive on the server and call it something like ‘EOYJune2010’ and archive all relevant reports into there.
  2. If you are doing a stock take please ensure that you have printed and archived a stock on hand report BOTH BEFORE AND AFTER THE STOCKTAKES.
  3. Ensure that you have printed and archived The Stocktake Variance reports
  4. Ensure all data for the last day in June is completed and dated and entered correctly into Readysell.
  5. At end of Trade on the 30/6/2010 Run a Stock On Hand Report, Print it as well as ARCHIVE it into a safe folder on your hard drive.
  6. Print out whatever other relevant reports that you may require in respect to sales, stock on hand, etc.
  7. You may not run your debtors or creditors end of month as yet as you are probably waiting to download your bank statement early the next morning as you will have direct deposits and electronic transfers and miscellaneous transactions dated up to 30/6/2010.
  8. If this is the case, then the next step would be at end of trade on the 30/6/2010 please ensure that a number of BACKUPS are done.
  9. Firstly the normal backup then another backup and keep it off site as well as label it.
  10. If you require the data to be backed up into a separate database as well please contact Readysell.
  11. Early the next morning on the 1/7/2010 no transactions in sales or purchasing should be backdated into June 2010.
  12. Unless of course if your company policy for Suppliers is different and you allow the first week of the next month for supplier invoicing.
  13. Bear in mind if you are receipting supplier invoices re stock on hand, the stock on hand figures on the stock on hand report that was run 30/6/2010 will not change due to the back dating.
  14. Down load your bank statement and enter all deposits and payments and misc entries that have not yet been entered into Readysell for June and date them the DATE (JUNE) as per your statement.
  15. These can be backdated as you have not yet run your Debtors Trial Balance or Statements.
  16. Allocate the payments then run through your normal End of Debtors process.
  17. Remember to archive debtors trial balance and debtors statements and transaction listing.
  18. Make sure you do you last Bank Reconciliation dating it month ending 30/6/2010.
  19. Please ensure with Bank Reconciliations that you do not present any forward dated transactions into the end of financial year bank reconciliation.
  20. Print out your both Bank Reconciliation Reports and attached them to the bank statement.
  21. Any customer payments that are received on the 1st July 2010 can be entered but please DO NOT ALLOCATE THEM until the trial balance and statements have been run for JUNE 2010.
  22. As for suppliers if you do not cut off exactly on the 30th June 2010, then please ensure you DO NOT RUN A CHEQUE RUN for July until you have finalised June and run and archived your Supplier Trial Balance. If you do need to pay suppliers in July, then don’t do a cheque run whereby allocation is automatic, enter the payments as manual SUPPAY and date them July BUT DO NOT ALLOCATE THEM IF YOU HAVE NOT CLOSED OFF SUPPLIERS FOR JUNE.

SITE THAT ARE RUNNING CASHBOOK AND GENERAL LEDGER

Please follow steps below:

  1. If you are doing a stock take please ensure that you have printed and archived a stock on hand report BEFORE AND AFTER THE STOCKTAKES.
  2. Also ensure that you have printed and archived the Stocktake Variance reports.
  3. Ensure that all data is entered and dated correctly for the last day in June is completed in Readysell.
  4. Ensure that all transactions that physical reduce or increase stock like stock adjustments, stocktakes, sales, purchasing, credit requests, stock transfers are entered prior to Running Your End of Year Stock on Hand Report.
  5. At end of Trade on the 30/6/10 Run a Stock On Hand Report, Print it as well as ARCHIVE it into a safe folder on your hard drive.
  6. Print out whatever other relevant reports that you may require in respect to sales reports, stock on hand, etc.
  7. You may not run your debtors or creditors end of month as yet as you need to download your bank statement early the next morning as you will have direct deposits and electronic transfers and miscellaneous transactions dated up to 30/6/10.
  8. If this is the case, then the next step would be, at end of trade on the 30/6/10 ensure that a number of BACKUPS are done.
  9. Firstly the normal backup then another backup and keep it off site as well as label it.
  10. If you require the data to be backed up into a separate database as well please contact Readysell.
  11. The next morning on the 1/7/10 no transactions in sales or purchasing should be backdated into June 2010.
  12. Unless of course if your company policy for Suppliers is different and you allow the first week of the next month for invoicing.
  13. Bear in mind if you are receipting supplier invoices and stock on hand, the stock on hand figures from the stock on hand report that was run 30/6/10 will not change due to the back dating.
  14. Down load your bank statement and enter all deposits and payments and misc entries that have not yet been entered into Readysell for June and date them the DATE (JUNE) as they are on your statement.
  15. These can be backdated as you have not yet run your Debtors Trial Balance or Statements.
  16. Allocate the payments then run through your normal End of Debtors process.
  17. Remember to archive debtors trial balance and debtors statements.
  18. Make sure that the last Bankrec for Each Bank Account is dated and extracted to 30/6/10.
  19. Please ensure with Bank Reconciliations that you DO NOT PRESENT/TAG any forward dated transactions into the end of financial year bank reconciliation.
  20. Print out your both Bank Reconciliation Reports and attached them to the final bank statement for that financial year.
  21. Any customer payments that are received on the 1st July 2010 can be entered but please DO NOT ALLOCATE THEM until the trial balance and statements have been run for JUNE 2012010.
  22. As for suppliers if you do not cut off exactly on the 30th June 2010, then please ensure you DO NOT RUN A CHEQUE RUN for July until you have finalised June and run and archived your Supplier Trial Balance. You can enter manual Supplier Payments and date them July BUT DO NOT ALLOCATE THEM IF YOU HAVE NOT CLOSED OFF SUPPLIERS FOR JUNE.
  23. The General Ledger is an overnight process which runs as part of the End of Day Backup. So that means that all data entered into Readysell on the 30/6/10 will update the General Ledger and Generate Journals sometime after trade and ready for reviewing the next morning.
  24. Check the General Ledger the next morning and Print off a Profit & Loss, Balance Sheet and General Ledger Trial Balance.
  25. Ensure you archive these as well.
  26. The general ledger does not have to be closed off at the end of June. It can be left open for Manual Journal Entries or Miscellaneous Debits and Credits into Customers or Suppliers that have no physical affect on Stock on Hand only Miscellaneous Expenses.
  27. Ensure that you have run your General Ledger Postings Report and compared it to your source modules of Sales, Customers, Suppliers and Cash Book (General Ledger Balancing Act).
  28. Ensure that at the beginning of the next month you have closed your financial Period to prevent Back Dating.
  29. Once you are ready to close off the financial year, you will need to rerun your 3 general ledger financial reports, send them off to your account to be reconciled.
  30. Usually your account will provide you with a reconciling journal for that financial Period.
  31. That journal needs to then be entered into Readysell in the right Period.
  32. Then you need to contact Readysell so that you can run and clear that financial year (P&L Appropriation Process).

Adding Images To Your Readysell Product File

A new document has been created and called “Adding Images To your Readysell Product File”. This document will show you how can can associate images of products for display in your Readysell system.

You can download the document in the “Support Downloads” section of our web site under “Readysell Version 7” > “Basics” (click here). Please download this file for future reference by right clicking on the file name and selecting “Save Target As”.

New Documents Now Available

3 new documents relating to Readysell 7 functionality have now been released:

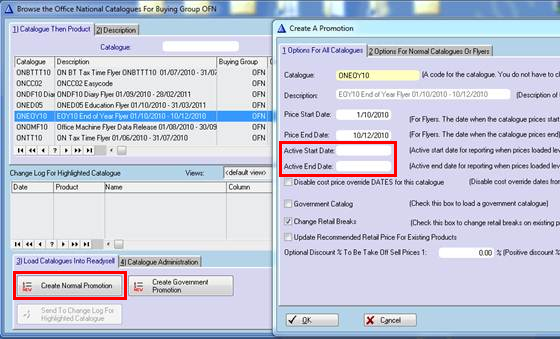
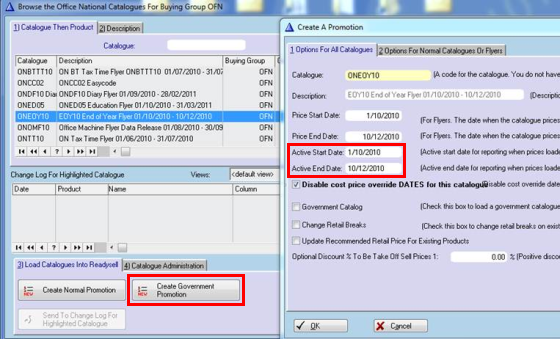
  1. V7 Creating Your Own Flyers/Promotions (Available under the “Products and Stock” category)
  2. V7 Adding On A New Staff Member Operator Code (Available under the “Basics” category)
  3. V7 Customer Payments At The Front Counter POS (POS = Point Of Sale) (Available under the “Sales and Service” category)

You can download these and all of our documents from the Support Downloads section on the Readysell Website.

Last Week’s Webinar

A big thank you to all of our customers that attended the Readysell-Office Brands Integration Webinar last Thursday. This was our first experiment with the format and we believe it was a huge success.

We had almost 30 representatives from Office National and Office Products Depot stores around Australia in attendance and had some great questions and feedback. We hope that we cleared up the majority of the outstanding issues around RObI, WebSphere and how they relate to you as a Readysell user.

As a follow up, we would like to hold another integration-related Webinar after the Easter break. This time, we are looking to run it as an “open forum” format where everyone will have the opportunity to ask questions at any time. In preparation, we would like to know if you have any areas that you would like covered, feedback on what days/times suit you best and any suggestions for improvements we can make on our last Webinar session.

We look forward to hearing from you and will have more information about our next webinar in the coming days.

Readysell-Office Brands Integration Webinar

This coming Thursday the 25th of March at 2pm Sydney time, Readysell will be hosting a Webinar covering all of the integration points between Readysell and WebSphere. We will be paying specific attention to the recently added Contract Upload component, however will also be covering Order Imports, Store Product Uploads and Invoice Uploads.

We urge all of our Office Brands customers to join the Webinar to ensure you are fully aware of the recently implemented changes, how they effect you and any work that will be required from your side to start the integration process and keep it running smoothly.

Please reserve your Webinar seat now at by going to https://www2.gotomeeting.com/register/166895947

If you have any trouble doing this or have any questions or suggestions for topics to be discussed, please contact adam@readysell.com.au.